Data Approval
How to Approve data
- On the search menu select the reports App, then click on the Data Approval link on the side menu.
Note
Only CoPs have approval permissions in the platform.
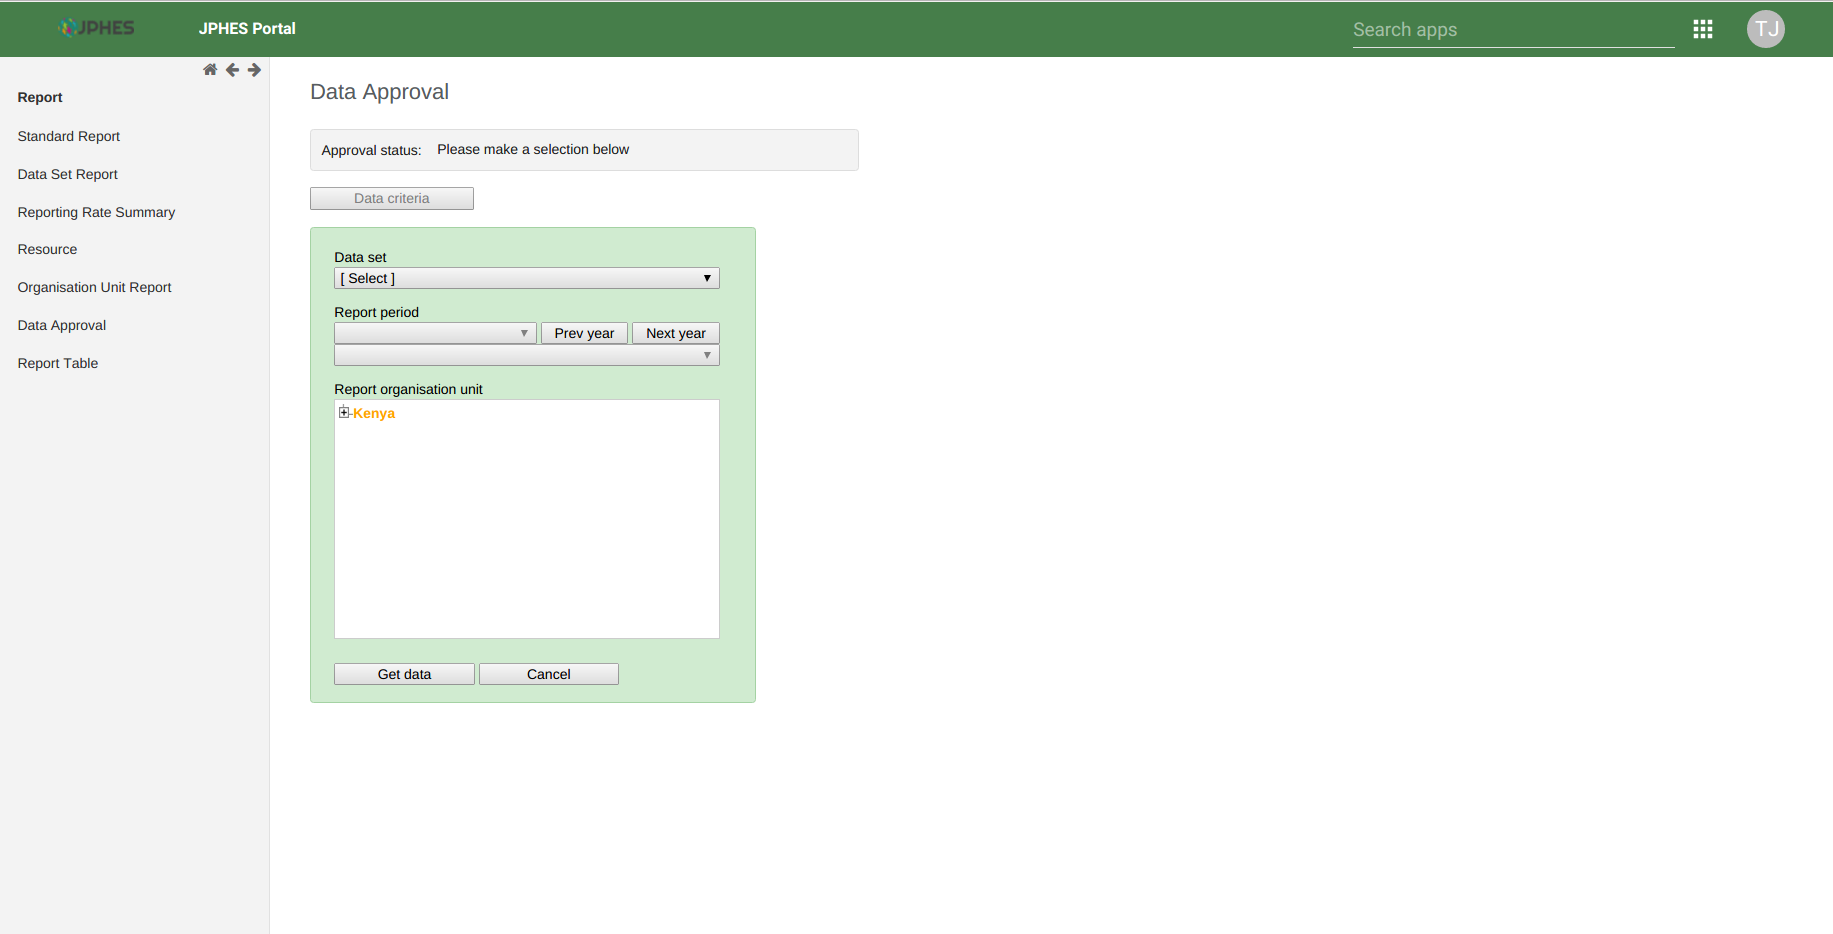
Fig -Data Approval Page.
- Select a data set to approve, the period(based on the reporting period of the data set) and then Kenya(Represents Mechanism level).
Note
If the reporting organisationunit hierarchy does not appear on the data approval page. Navigate to data entry app and search for any facility on the search menu. Once the hierarchy appears on the data entry screen go back to data approval page, and the hierarchy should appear. It’s an issue of browser caching, to be fixed soon.
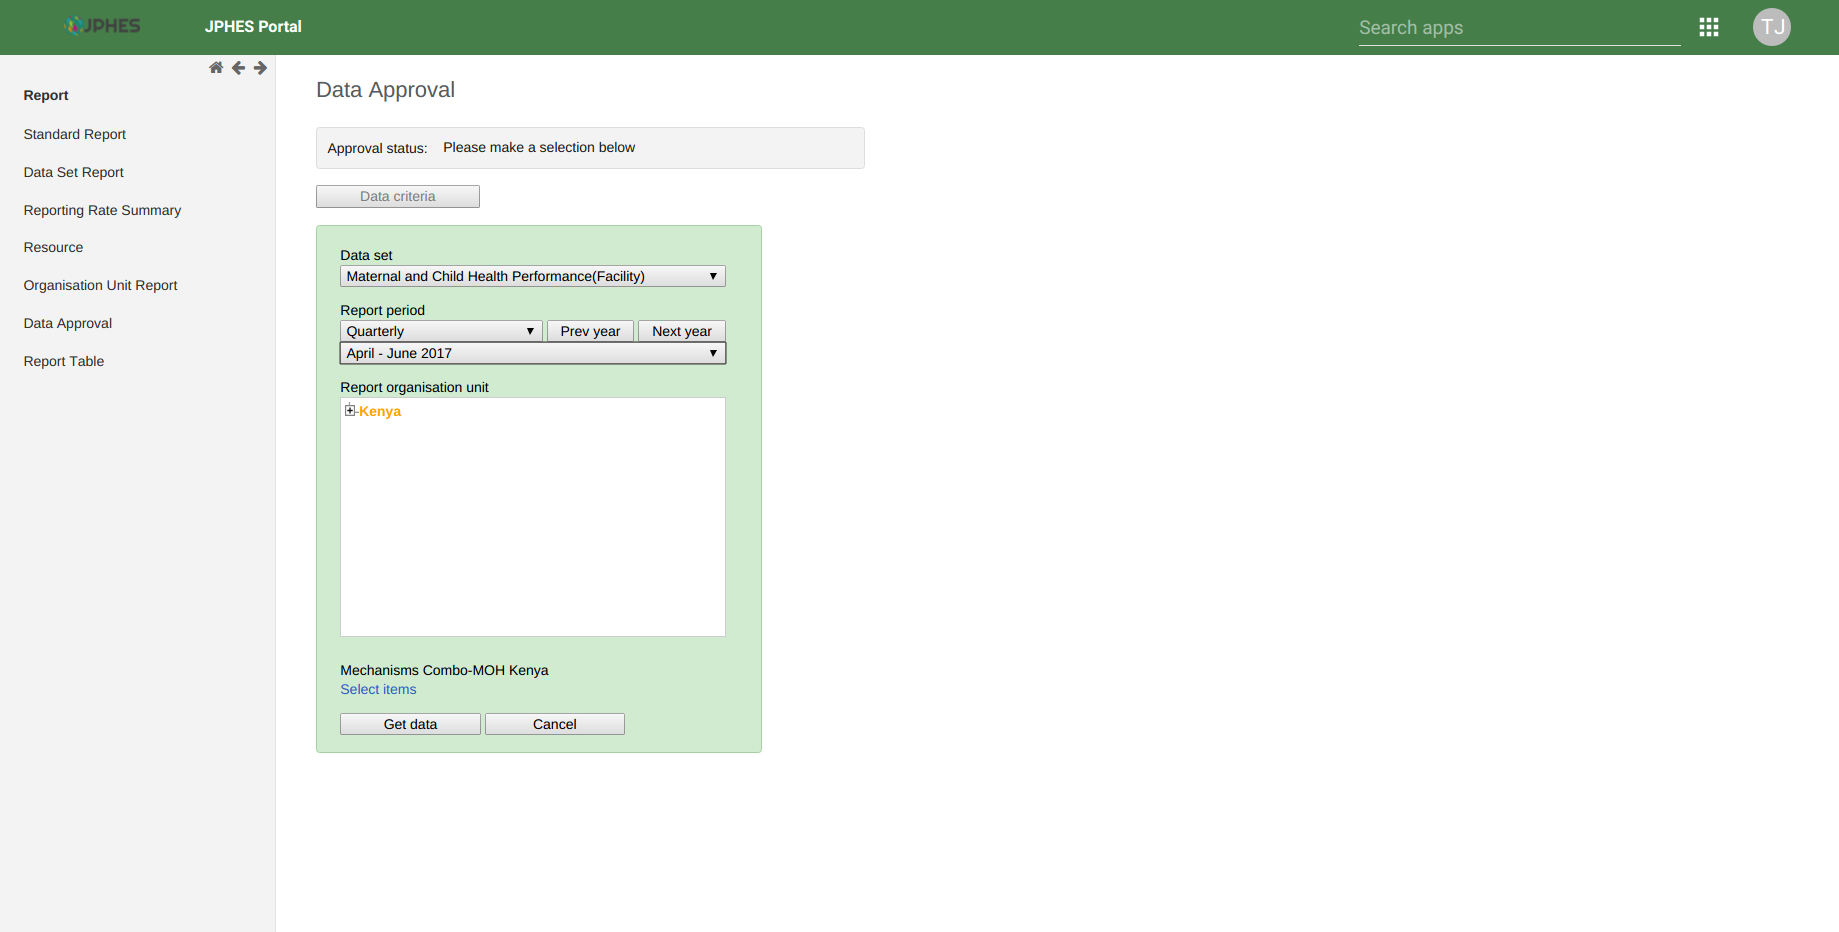
Fig -Selecting Options(Data Set, Period and Kenya-Mechanism level)
- Then click on the mechanism combo (select items) to select your mechanism on the pop-up menu.
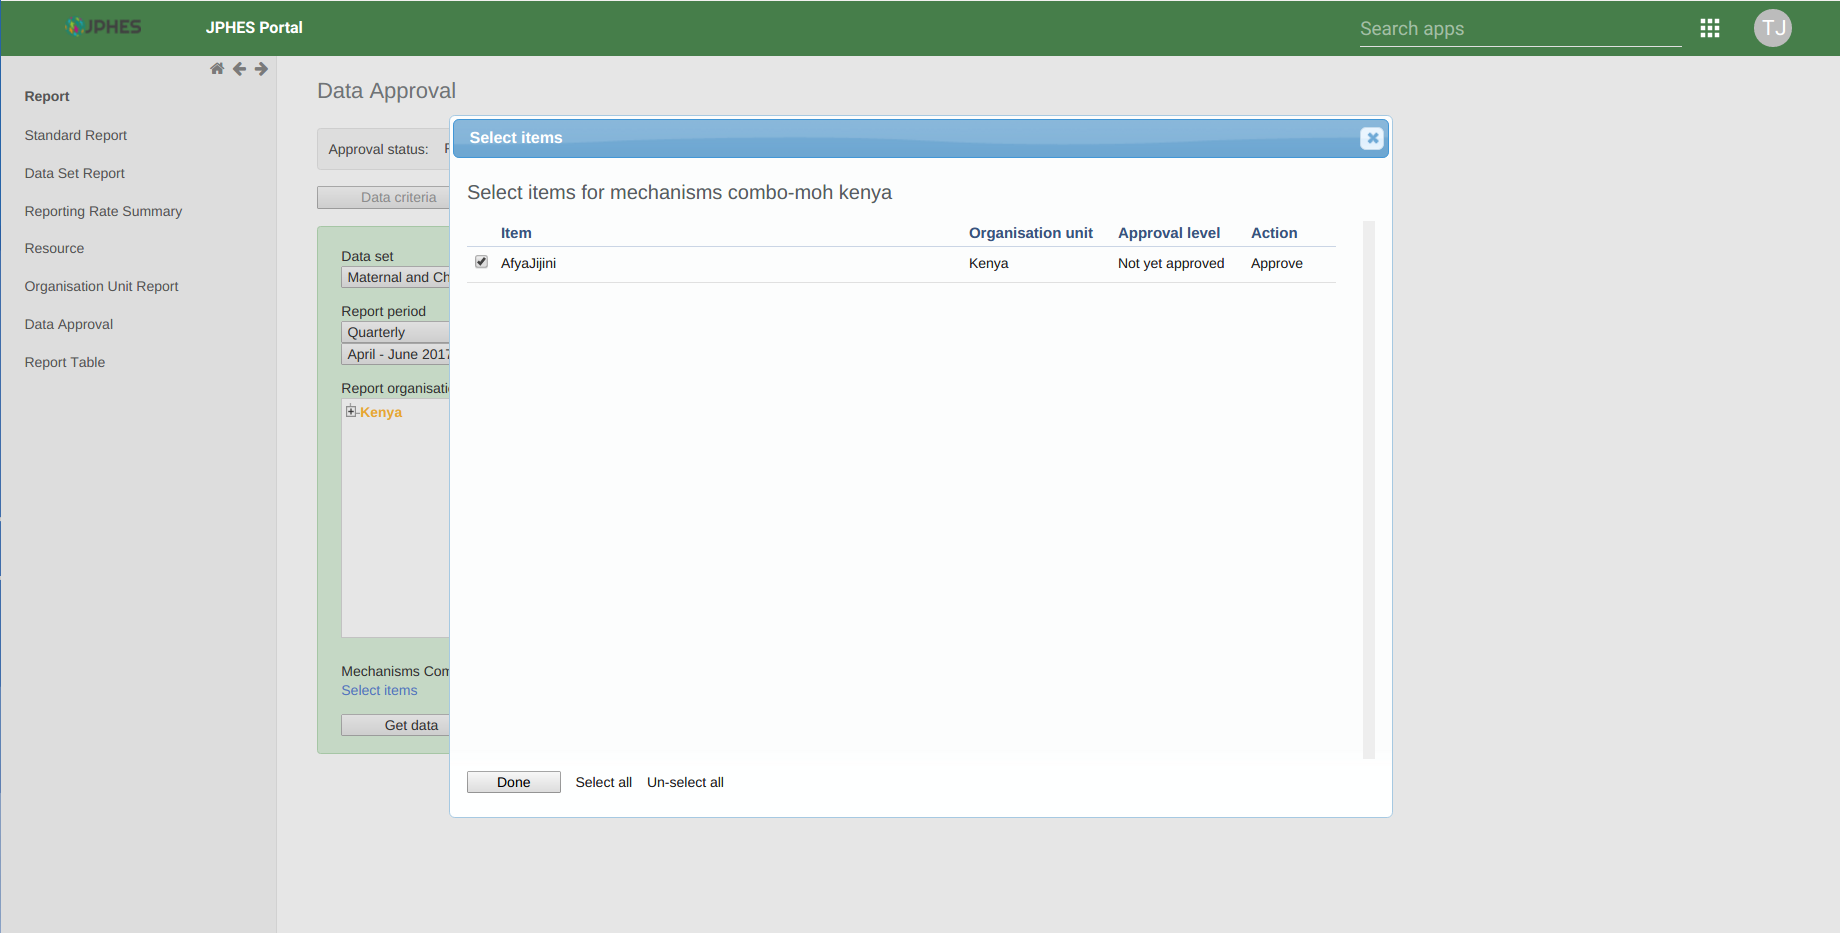
Fig -Selecting mechanism on the pop-up menu.
- Lastly, click on Get data button to generate and display the data set report based on your selected options. Confirm the values on report and click Approve if they’re okay.
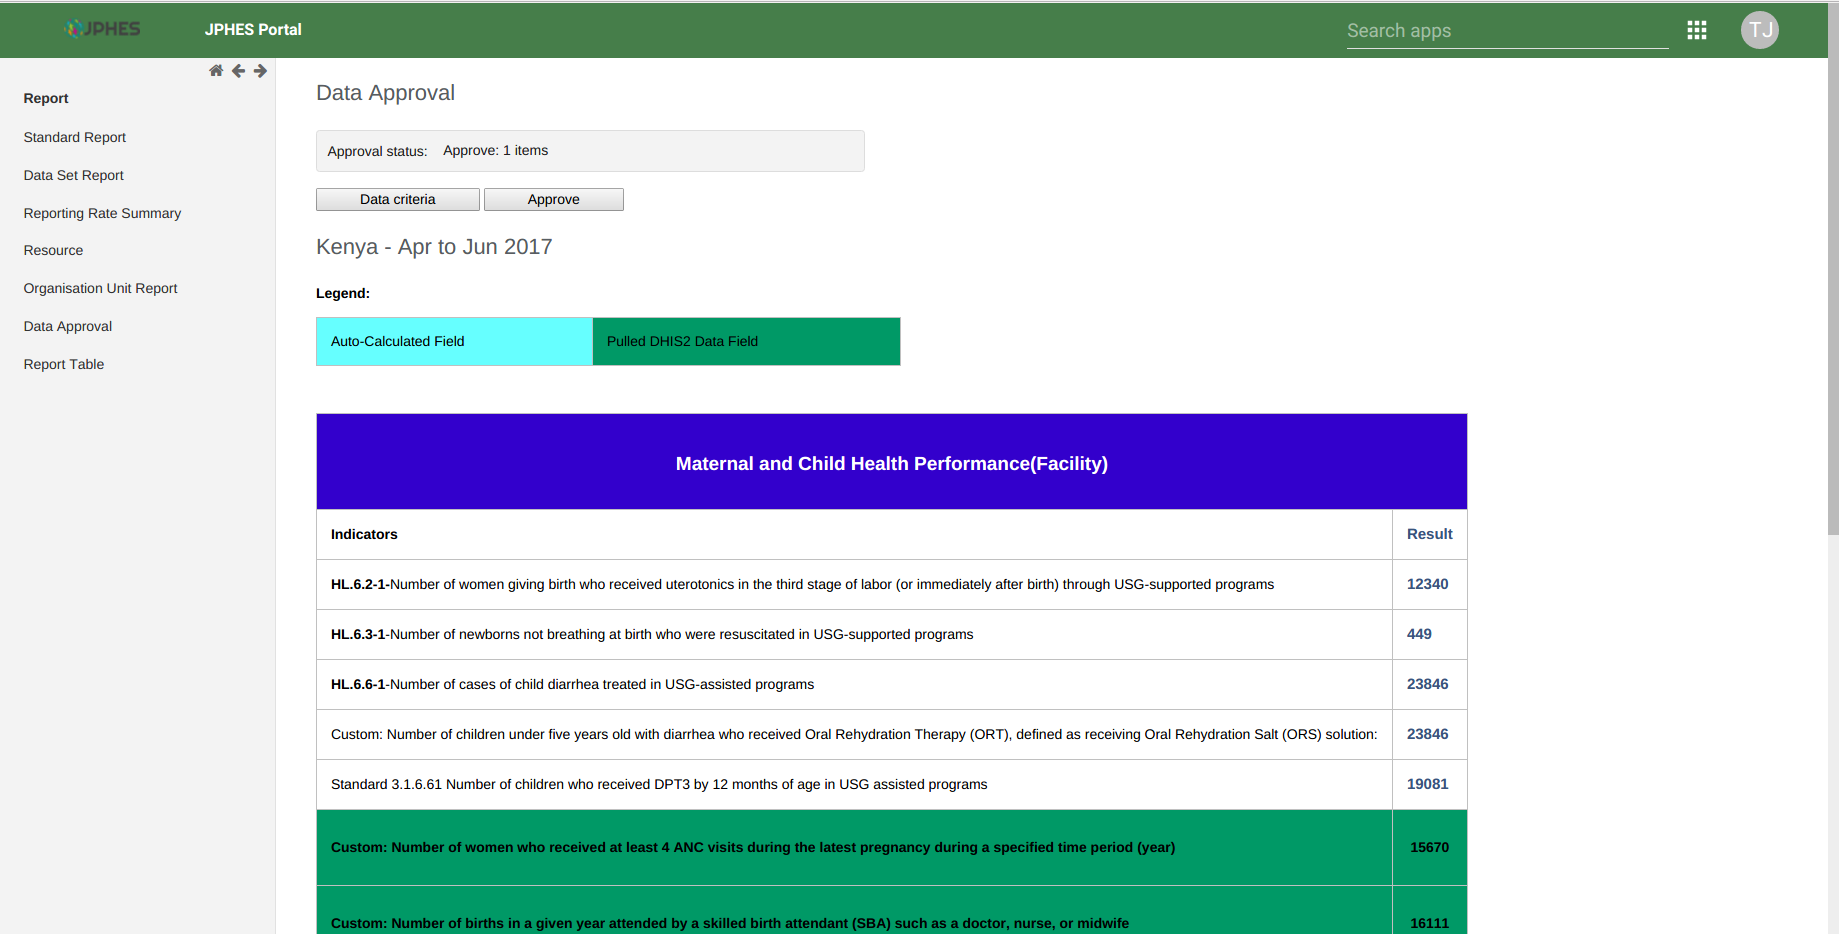
Fig -Data Set report to approve.
Note
Once a data set report for a specified period is approved no updates can be done on the data. To make updates the data set report should be unapproved first.